
Editing, Undo/Redo, saving, and recovery.
Authoring scenes & HUDs
Authoring is the act of composing what the game contains: which objects exist in a level, how they are arranged, and what the player sees on screen. In the DemiEngine editor, authoring happens in two integrated stages — scene documents for game worlds and HUD documents for interfaces — with one shared selection model, one undo history per document, and saves that keep your JSON diffs small. This page walks the workflow on the sample game "Skyforge" at games/my_game.
Switching documents
The workspace registers the project's scenes and HUDs from demi.project.json and the conventional source folders. Opening a document is one click:
- Click a registered scene source — the active stage switches to that scene. The hierarchy, viewport, Inspector, diagnostics, and undo history all target the scene document.
- Click a HUD source — the HUD stage opens with the same hierarchy, viewport, selection, Inspector, undo/redo, save, diagnostics, and recovery paths as the scene stage.
- Click a prefab source — the prefab stage opens for that reusable entity composition.
There is no second, modal interface editor and no separate HUD preview model: one workspace, one editing contract, three document kinds. Document shapes are described in demi.project.json.
Create and finish a project in the editor
- Use File → New project to choose a starter. File → Create (also under Assets → Create) creates a 2D/3D scene, HUD, entity or UI prefab, or Lua behaviour. The Assets Create menu also offers materials and data assets.
- Build the scene and HUD in their stages. Use Scene → Create prefab from selection to create a reusable source and replace the selection with a linked instance. Replace selection with a prefab instance is on by default: entity IDs, placement, hierarchy and references stay intact. Uncheck it to create an unlinked copy. One Undo restores the original hierarchy; the reusable prefab file remains. Add it through Scene → Add prefab instance, the Assets action, or a drag onto the Scene viewport.
- Attach a HUD with Scene → HUD. Set the built game's Start scene in Project Settings; the open editor scene does not choose it for you.
- Double-click a Lua behaviour to edit it in your configured external code editor. Use Ctrl+S or File → Save all for authored documents and project settings, then Build → Build Project for the saved game.
Lua scripts created in the editor appear immediately in Assets and Add Component across all open scene, HUD and prefab documents. On Linux, external script saves, renames and deletions are detected automatically; annotation changes refresh Inspector metadata after a short debounce. These updates preserve unsaved documents and their Undo history and do not restart Play or reload running gameplay. Use F5 for a full project refresh if needed. If native watching is unavailable, Console reports the fallback; automatic external discovery currently requires Linux.
In the Inspector, changing an inherited default authors that field; Reset removes the authored value or instance override. Hover a property label to see its origin. Unpack preset turns preset-inherited components into editable independent components when you need to restructure them. An instance's Add Component affects only that instance; Open source prefab edits the shared source.
Building a scene
A scene is one file describing everything that loads together — a level, a menu screen, an arena. In the editor you assemble it like this:
Click an object in the 2D or 3D viewport to select it in the hierarchy and Inspector. Drag a selected object's translate, rotate, or scale gizmo to edit that object; crossing another object or leaving the viewport does not switch the drag target. Release to finish, or press Esc to cancel the edit.
Close-up picking includes the visible part of an object's bounds when the camera or near clipping plane is inside them. Fully clipped bounds are not picked. Transform handles keep a consistent screen size instead of growing across the viewport as you approach the object.
Mesh surface controls
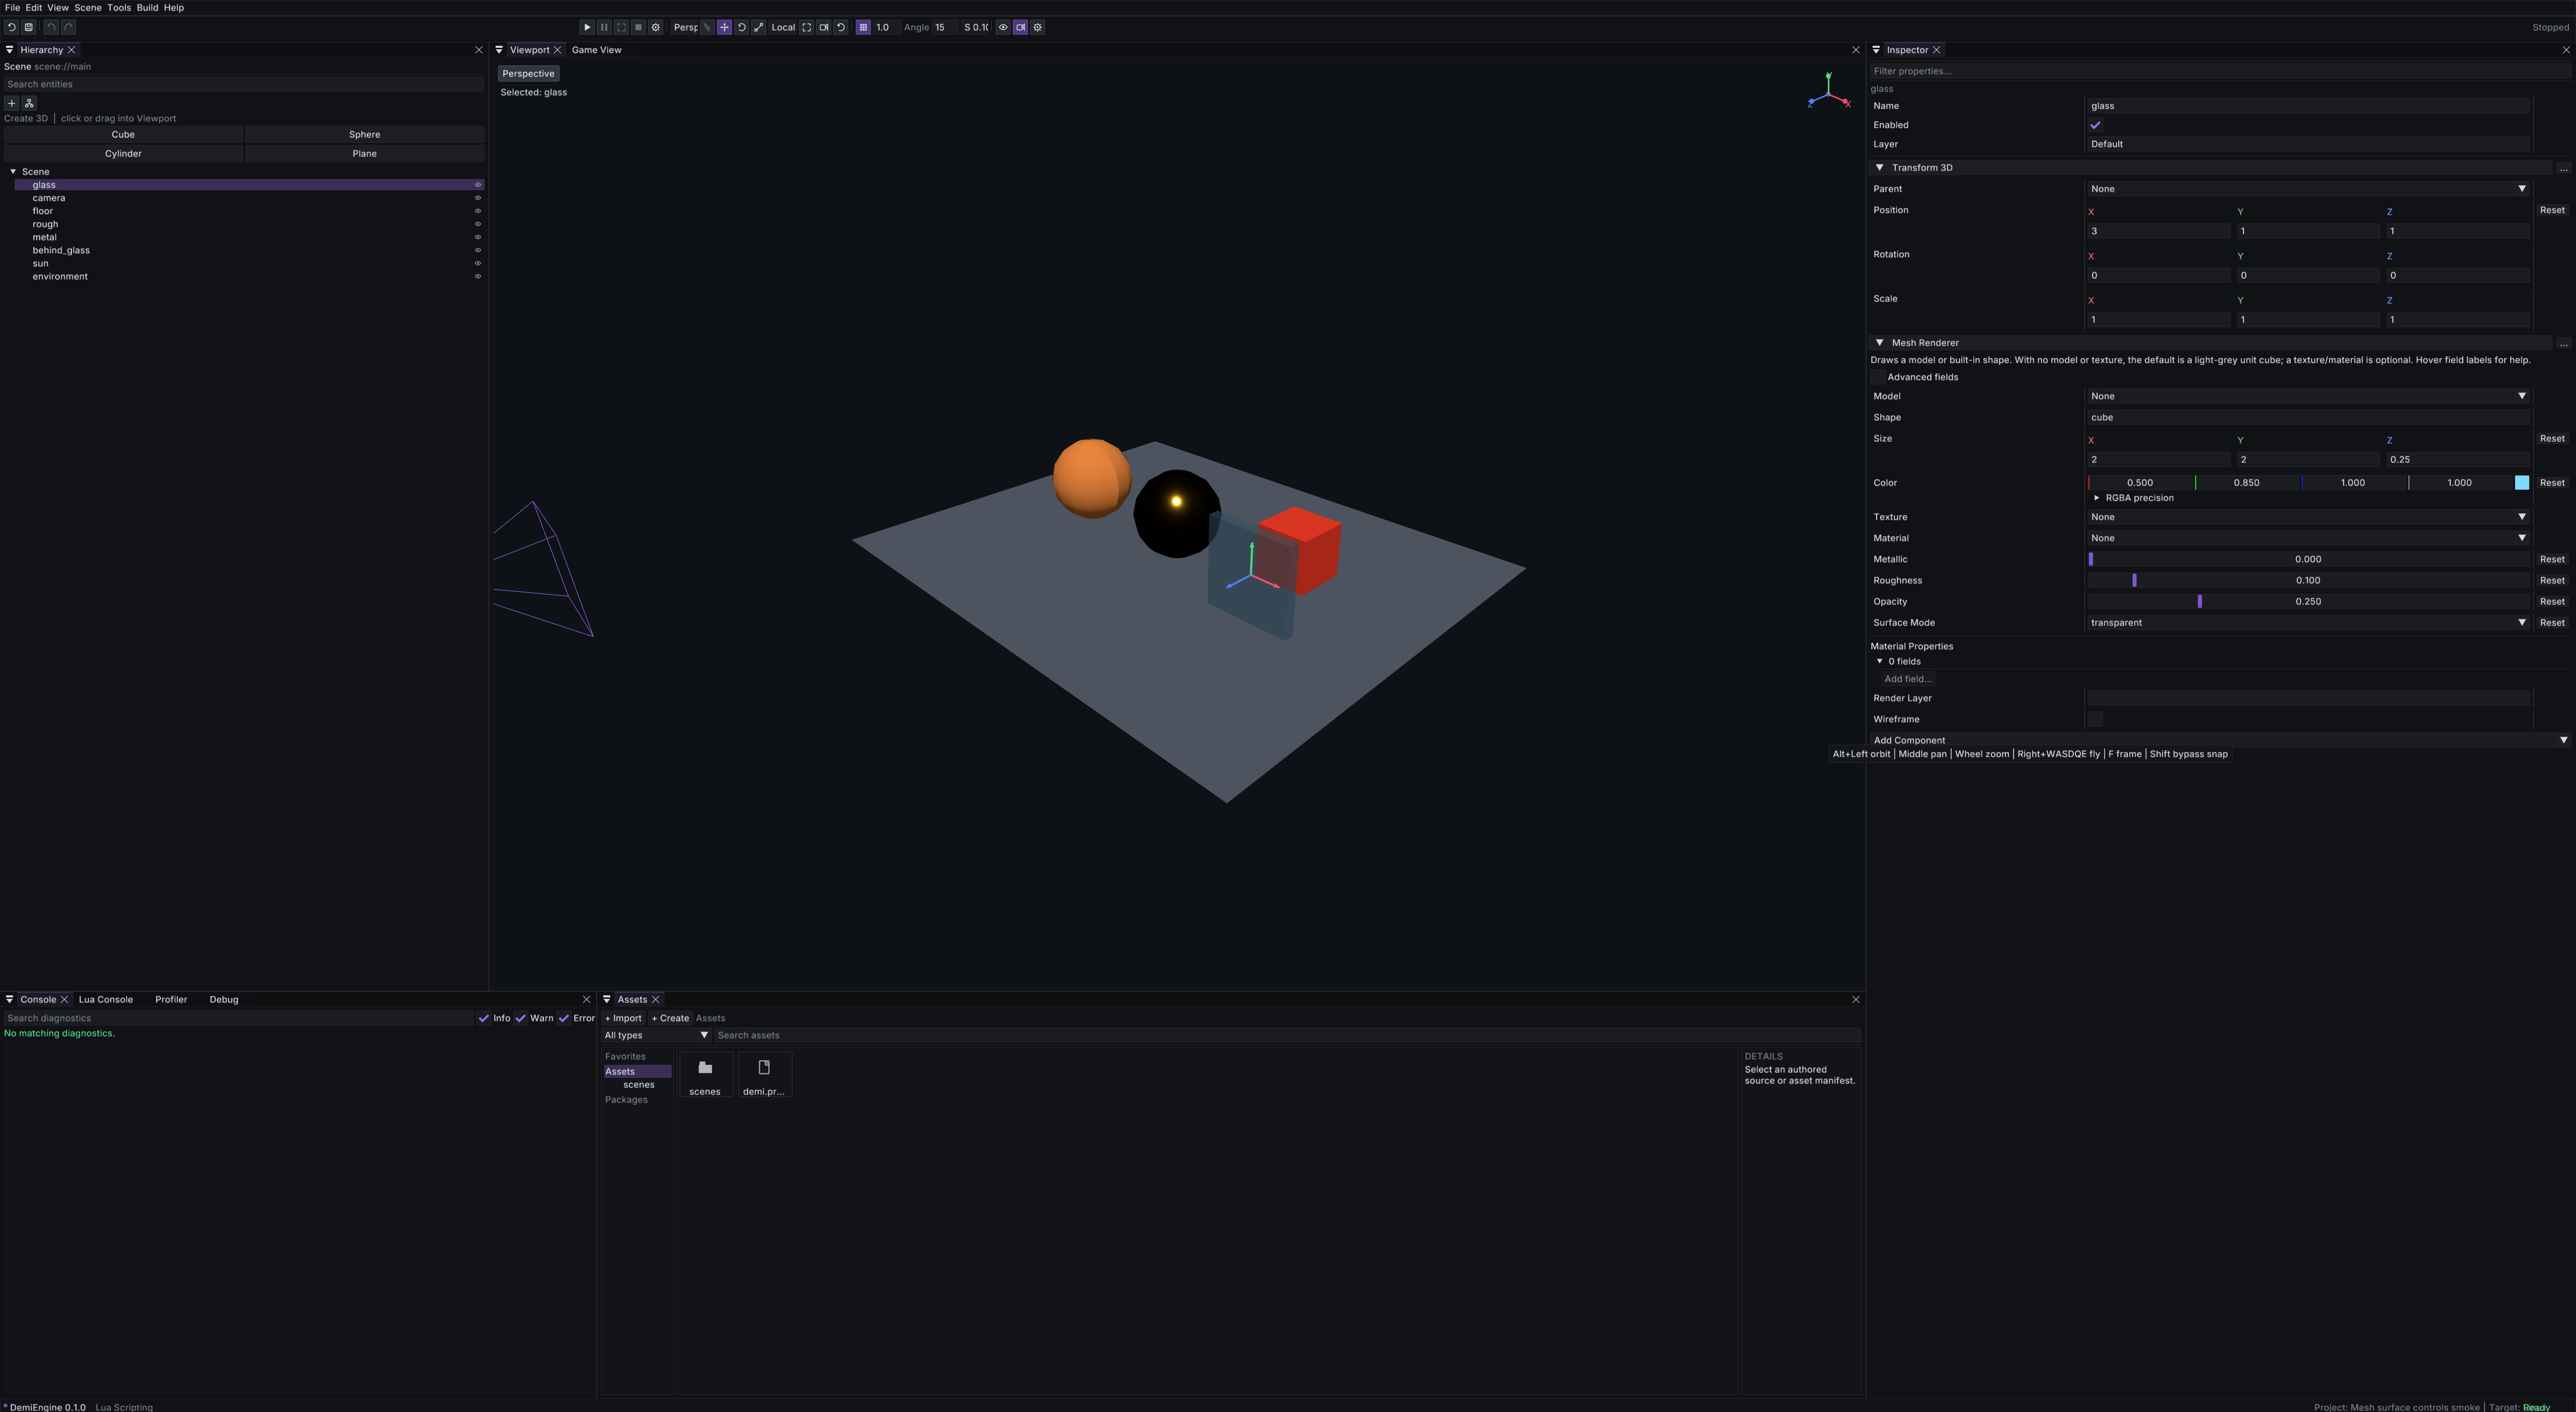
Mesh Renderer exposes Metallic, Roughness, Opacity and Surface Mode. Metallic, roughness and opacity use 0–1 sliders. Omitted fields inherit the assigned material; without one, they use metallic 0, roughness 0.8, opacity 1 and opaque rendering. Reset removes the entity override rather than copying the current inherited value into the scene.
Choose Transparent and lower Opacity for tinted glass-like props. Opacity alone does not change an opaque surface into a blended one. Effective alpha multiplies texture alpha, colour alpha, material base-colour alpha, opacity and any fragment fade. Transparent meshes draw after opaque meshes, sorted back-to-front by renderer position, and do not write depth. Sorting intersecting geometry or individual triangles inside one transparent mesh remains approximate.
The built-in lit shader uses direct metallic/roughness lighting for directional, point and spot lights. Low roughness produces narrower highlights; metals use their base colour for specular light and have no diffuse lobe. There are no environment reflections, reflection probes, screen-space refraction or glass transmission in this path yet. A metal under ambient light alone can appear dark. Fully polished roughness values remain authored, but shading uses a small internal roughness floor to keep the specular calculation finite.
Place props on terrain
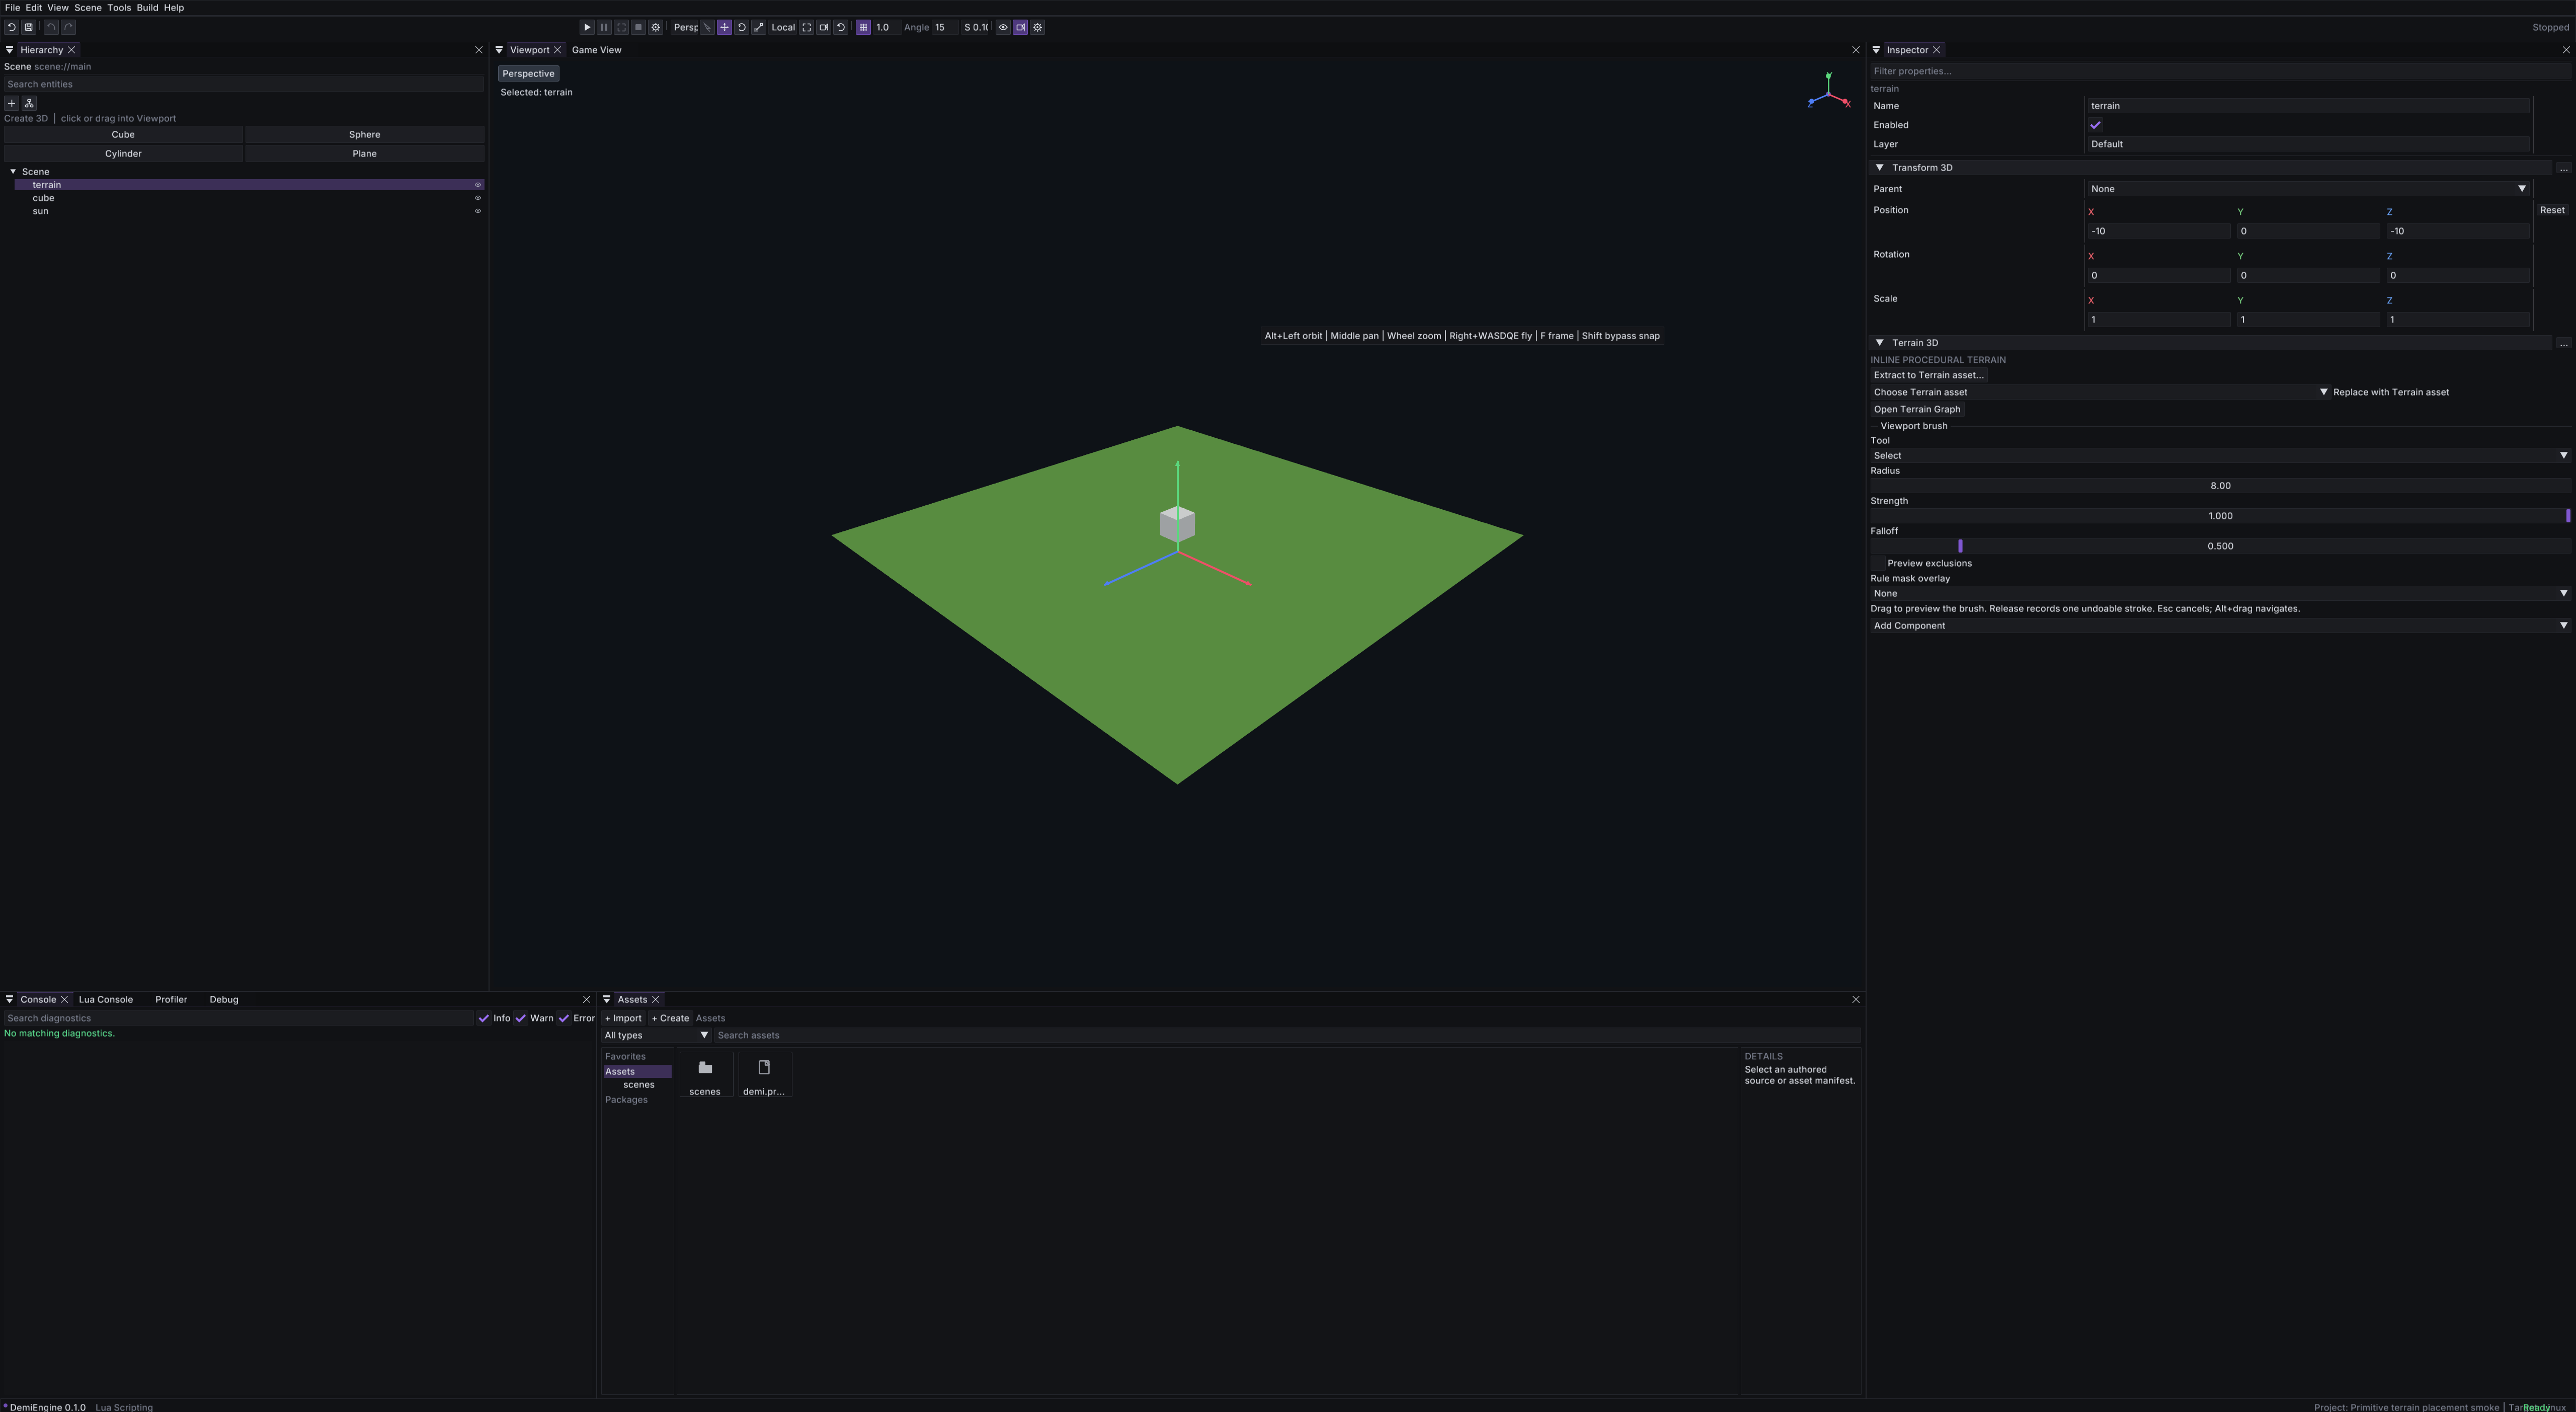
The Hierarchy's Create 3D buttons create visible Cube, Sphere, Cylinder and Plane objects. Click to create near the current view centre, or drag a button into the Viewport to choose its position. A drop first intersects enabled generated terrain, including transformed terrain placements. Primitives are positioned with their base on the hit surface; prefab drops preserve their authored pivot and root offsets. If no terrain is hit, placement uses the ground plane within the current view's working range, then falls back along the cursor ray at the view focus distance.
Add Empty creates a container, not a visible cube. The physics preset menu labels collision-only objects explicitly. Visible primitives use the built-in mesh and light-grey colour without requiring a texture or material. They have basic colliders but no Rigidbody: the cylinder uses a capsule approximation, and the plane uses a thin box. Adjust or remove those colliders to match your gameplay.
A MeshRenderer draws geometry. A BoxCollider3D describes collision, and a Rigidbody3D controls physical motion, gravity and mass. None replaces either of the others. Without a Rigidbody, a 3D collider is static. The Inspector explains physics-only entities and offers Add Mesh Renderer when a visible mesh is missing.
Move sensitivity follows the projected handle: when viewing an object from farther away, the same pixel drag moves it farther in world units. Scale additionally accounts for the object's dimensions and parent scale; rotation remains angular. Snapping still applies, and holding Shift bypasses it. Press F to frame a small or distant selected prop.
Placement is a one-time authored position, not a terrain attachment. Later terrain sculpting does not move independent houses or props automatically. Precise placement currently targets generated terrain, not arbitrary imported mesh surfaces.
- Select the scene in the project sources so the scene stage is active.
- Add entities from the hierarchy panel. Each entity gets a stable ID that scripts, saves, and tests can rely on forever.
- Nest entities under their owner in the hierarchy. A weapon under a character's hand is a child; the tree mirrors the authored
childrenarray in JSON. - Add components in the Inspector — a transform, a sprite or model, a collider and body, a script.
- Fill component fields. Omitted fields use canonical defaults; typed values become explicit in the document.
- Place prefab instances when a composition repeats across levels.
- Save. The editor patches the source file with a small diff.
Why stable IDs? Because tests target nodes and entities by ID, saves refer to them, and network contracts name them. A stable ID is durable identity; a row number in a file is not.
Setting the starting camera view
Compose the desired view in the scene Viewport, select your game camera, then choose Scene → Align selected camera to view. This sets the camera's pose and projection in one undoable edit, including under a transformed parent or through a prefab instance override. Save, then use Game View to check framing at the game's aspect ratio. See Workspace & panels for supported settings and camera-follow behavior.
Authoring a terrain
Use Assets → Create to start a Terrain Material, Terrain Material Set, or Terrain Palette. A material begins with a name and linear base colour. For a set, choose an existing terrain material for its initial ground role. For a palette, choose an existing Model3D asset for its initial soil role, or choose an entity prefab and a terrain material together. The editor offers references from the open project's registry and creates these as versioned data assets with stable asset:// IDs and declared dependencies. Import the required art first when no reference is available.
Create a Terrain asset through Assets → Create → Terrain... and drag it into a 3D scene. Placing it selects the new terrain entity and opens its controls in the Inspector, ready for editing. Alternatively, add Terrain 3D to an entity with Transform3D and choose an existing terrain asset. Select that placement and choose Open Terrain Graph to configure size, cell resolution, seed, chunk size, landforms, biomes, rules, palette and connected modules. Generation settings are an unapplied draft until you generate; Discard draft restores the applied recipe.
Height-field generation runs in a background worker with progress and cancellation. The previous terrain remains visible until a completed result is validated and committed. Installing the result still assembles the generated meshes, so publication can take additional time for large terrains.
Choose a viewport brush in the Terrain component Inspector: Raise, Lower, Flatten, Smooth, Paint biome, Protect, or Paint exclusion. Adjust radius, strength and falloff; biome painting also chooses an existing biome ID. The brush ring follows the terrain surface, including its entity transform and parent hierarchy. Drag on the terrain and release to apply one undoable stroke. Esc cancels the stroke; Alt+drag navigates. Flatten uses the height at the start of the stroke.
Protect fully captures every height sample inside its radius; it has no strength or falloff controls. Later seed and biome changes preserve that area. Clear protection removes all protection snapshots from the draft after confirmation; Clear all edits also removes sculpt edits and painted regions. Regenerate applies either removal, and Undo restores the applied recipe. Changing size or resolution with existing edits opens a decision dialog. You can keep radial edits at their existing local positions when the draft has no protection snapshots, clear all painted regions and edits, or cancel. Protection snapshots require their original grid.
Apply changes to asset saves the shared terrain source and prepared surface, including painted regions, sculpt edits and protection snapshots. Edit directly in the scene Viewport; opening the isolated asset stage is optional. Other placements of that asset share its edits, while the scene keeps only its Terrain3D.asset reference and independent placement transforms. Explicit inline procedural recipes instead save to their owning scene or prefab. Generated mesh vertices do not enter authored source. Click a generated terrain chunk to select its authored owner. Return the brush to Select to use the ordinary transform tools.
Composing terrain modules
For a procedural chain, select the Terrain 3D entity and choose Open Terrain Graph in its Inspector. For a guided start, open the Terrain Presets tab beside Inspector and choose a starter landscape. Its graph includes editable comment nodes explaining each step. The independent Terrain Nodes panel lists the graph's current node types by category; drag one onto the graph canvas. Connect matching output and input pins, ending at a Terrain Output node. Starter graph creates a small working chain if you want a starting point. Graph edits remain an unapplied draft: inspect any node diagnostics, then press Generate to evaluate the graph and update the terrain. Undo graph and Redo graph change the draft before generation.
The graph builds the procedural base; authored biome regions, sculpt strokes, exclusions and protection remain separate surface layers. Regeneration replays those edits over the new base. A grid change with existing edits asks whether to keep compatible edits or clear them; protection snapshots require their original grid. See Terrain generation and editing for the supported modules and their outputs.
Building a HUD
A HUD document is a tree of interface nodes: panels, labels, buttons, virtual sticks, and containers. The HUD stage is the same editor experience pointed at an interface tree instead of a world:
The HUD has its own document session, including when you edit the HUD attached to a scene. Its source, selection and Undo/Redo history stay separate from scene editing. You can keep HUD and Viewport visible together; clicking the scene does not replace the HUD displayed in its window. Clicking Inspector or UI Palette keeps the HUD editing context active.
While editing a HUD or UI prefab, the separate UI Palette panel lets you search or browse controls and the UI prefabs found in the project and its installed packages. Drag a card onto the HUD canvas. The drop nests under the authored container at the pointer (or the selected element's container). Free-layout containers use the HUD's design coordinates for positioning. In Row, Column and Grid containers, the pointer chooses insertion order and the container places the new control without a drag offset. Row and Column drops insert before a child's midpoint or append after the last child; Grid drops choose a visual row, then a horizontal insertion point. Hidden controls do not consume visual slots. UI prefab roots receive local placement overrides. Select any generated descendant to override its properties locally through the Inspector. UI Palette can add local content to inherited containers, and Delete removes inherited nodes from this instance. Instance overrides provides property resets and Restore for removed nodes. Shared source files remain unchanged. A drop is one undoable edit. In the 2D starter projects, reusable health bar and panel button row UI prefabs appear here; edit their prefab sources to change every instance. UI Palette is hidden outside HUD editing, and can be docked beside Inspector or elsewhere in the workspace.
- Open the HUD source. The HUD stage shows the interface in the viewport at its design resolution.
- Compose nodes in the hierarchy. Layout conventions (omitted root, fill containers,
dock,stack,pad,at) place nodes without hand-written anchors everywhere. - Edit node fields in the Inspector: type defaults, style defaults, hex colors, actions for interactive controls.
- Keep readable and interactive content inside the safe area. Set
respect_safe_area: falseonly for intentional edge-to-edge backgrounds, and keep controls clear of cutouts. - Save — the same small-diff, atomic save as scenes.
Dock preset buttons replace custom anchors and old drag offsets in one undoable edit. The shared runtime aligns Bottom, Right and Center using the current resolved size and margins, so resizing stays aligned without reapplying a preset. The editor writes the dock value without a compensating position. Size, constraints, margins, padding and appearance remain authored as before. Turning docking off preserves the visible position with explicit anchors and an offset. Undo restores the exact previous layout, including at shorthand. Explicit position offsets remain available in docked documents.
HUD Inspector string fields (including Text, font/texture references, style, action, accessibility text and string prefab parameters) apply valid edits as you type. Clicking another control or changing selection keeps the edit. Ctrl+S and File → Save all save the current value even while the field is focused. Each editing session is one document Undo step; Enter, leaving the field or saving ends that session. In multiline Text, use Ctrl+Enter for a newline.
Interactive nodes (buttons, toggles, sliders, text inputs, virtual controls) connect to named input actions. Those actions are declared in the project file; see Input bindings for how virtual: inputs fill them.
Mutations are commands
Every edit in the editor is a command: a named change with a known inverse. That design is what makes editing safe:
- Reversible — undo and redo walk the command history per document.
- Validated — a command that would produce an invalid document is rejected before it lands, with a diagnostic in the diagnostics panel.
- Keyed by stable IDs — commands target entities and nodes by ID, not by tree position. Rearranging the hierarchy does not break the undo history.
When a change needs the preview to rebuild (for example, expanding a prefab instance) and the rebuild fails, the editor restores the document and the history to the last good state. You never keep a half-applied edit that the runtime cannot load.
Editing prefab instances
A prefab is a reusable template of entities. Scenes place it with an instance entry and a small overrides map instead of copying the whole tree into every level.
- In the scene stage, an instance appears in the hierarchy as its expanded children, with overrides marked on the fields they set.
- Editing an overridden field records an override on the instance; editing a non-overridden field can be pushed back to the prefab document in the prefab stage.
- Override rules: absent fields inherit, objects merge, arrays replace,
nullremoves, and a dotted key sets one nested field (for example"body.Transform2D.position").
The prefab stage edits the template itself, with the same Inspector, undo, and save behavior.
Drag an inherited entity or HUD node onto another parent to record a local parent override. The shared source and stable IDs stay unchanged. Unpack Prefab in Hierarchy or Inspector resolves the selected owning instance, including nested prefabs, into ordinary authored content with its current overrides. It preserves IDs and external references and supports Undo. Use it when this instance should stop inheriting future source changes.
How saves keep diffs small
Editor saves must look good in review. The rules:
- Save patches source with small diffs — only the values you changed are rewritten.
- Float noise is normalized so
0.30000000000000004does not pollute the file; neighboring multiline style and key order stay stable. - Saves are atomic and conflict-aware: the write either completes fully or leaves the previous file intact, and an external change to the file on disk is detected instead of silently overwritten.
Human-authored source stays human-readable. Generated content never becomes the authored identity.
Recovery
If the editor or the machine stops unexpectedly, the recovery path restores unsaved document state the next time the workspace opens the project. Recovery data is per-user, like dock layout, and never ships inside a package or a build artifact.
From authoring to proof
| After authoring… | Do this |
|---|---|
| Check the document and its references | Read the diagnostics panel, or run the checks in Build, cook & test |
| Try the level interactively | Play mode |
| Lock behavior with tests | E2E tests targeting your stable node and scene IDs |
| Arrange panels and stage switching | Workspace & panels |
Preview tabbed HUD pages
Click a tab button in the HUD canvas to preview its declarative UI action. The runtime and editor share show/hide/focus behavior. Preview visibility is temporary, stays outside saves and Undo history, and survives content edits. Use Reset preview state to return to authored defaults. You can add, edit and remove content on the visible page; gameplay Lua is not executed in this authoring preview.
Inspector controls
Layer and reference pickers include search. Entity layers are drawn from the project's declared physics layers, plus Default. An existing unknown value remains visible until changed; choosing a value does not rewrite the layer declarations.
Show advanced settings reveals specialized component fields. Property search includes hidden advanced fields. Hover a field label for its purpose, and a component header for an overview. Common camera controls stay visible; split-screen viewports, render scheduling and diagnostic modes live under advanced settings.
Colour fields use one standard picker with RGB/HSV/Hex options. The redundant RGBA precision foldout has been removed; existing floating-point colours are preserved when simply viewing them. The Material overrides section offers typed overrides for Base colour, Metallic, Roughness and Opacity, with Add and Remove actions. These override the material asset for that mesh; explicit surface fields take precedence. Unsupported existing entries remain intact until explicitly removed.
The toolbar groups projection, camera alignment and preview lighting under View, movement increments under Snapping, and diagnostic visibility under Overlays. Navigation help is in View instead of continuously covering the canvas. Hierarchy icons distinguish cameras, lights, terrain and prefab instances.
Controls, text and icons scale together using the current display's DPI. Editor UI zoom multiplies that scale. Saved dock sizes migrate with scale changes without resetting which panels are docked together; newly created 3D scenes include a basic environment and a sun with an editable Transform.
Use Assets → Create in the folder you are working in. The creation dialog names the selected type and previews its destination; compatible subfolders are retained, and incompatible locations fall back to the type's conventional folder. The File menu is a shortcut to the same creation workflow. Prefab creation explains whether the selected hierarchy will become a linked instance.
The 3D Rotate tool uses coloured axis rings. Drag a ring around the selected object's pivot; Local/World chooses the axis space, rotation snapping uses degrees, Shift bypasses snapping, and Escape cancels the gesture. The canvas fills the view directly below its dock tabs.
Hierarchy’s Create from entity preset menu includes primitive objects, cameras and lights alongside entity presets. Assets → Create groups Scene, Prefab and Terrain types into submenus. Vector fields keep each axis label beside its input; very narrow Inspectors stack the axis/input pairs.
Idle rendering and power use
The editor waits for events when an authoring view stops changing. Mouse and keyboard input, window events and source-file changes wake it. A short settling period allows hover feedback and dock targets to update. File-watch maintenance continues while idle without rendering; text fields schedule updates for their blinking caret. Embedded Play, visible animation previews and active background jobs continue updating.
VSync remains enabled. There is no default active-view frame-rate cap: idle power savings come from skipping unchanged frames, not slowing interaction or simulation. Waiting uses the shared SDL platform layer so the design also supports a future Windows editor.
For a bounded authoring trace, launch demi-editor --project <project> --max-seconds 20 --profile-frames /tmp/editor.csv. The CSV uses the runtime profiler format and includes editor frame/interval, UI, presentation and available GPU timings. It records rendered frames, not idle maintenance polls. GPU samples may describe earlier frames; do not add them to CPU samples as a single frame cost. Authoring capture pauses while embedded Play owns the profiler.